Shibori Tea Towels
So if you have been following Yellow Room for a while, I’m sure at this point you have noticed my love for Shibori. I have dyed shirts, dresses, blankets, tea towels, and more. Pretty much anything that is off white, stained, or just needs a little face lift. I LOVE IT!! Not only is it super cute, but it’s also pretty simple and really hard to mess up! That’s something that I really love about Shibori is that even if you have no idea what you are doing- it’s still going to end up very cool and unique.
Now there are hundreds of ways to create Shibori patterns using twine, popsicle sticks, rubber bands, clothespins, bulldog clips, and more. Shibori uses these tools to create spots/ areas on fabric that are not exposed to the dye- creating a unique pattern. You can find so many cool patterns and instructions, but today, I’m going to share with you 3 simple patterns for tea towels. So who’s ready to get started?!?
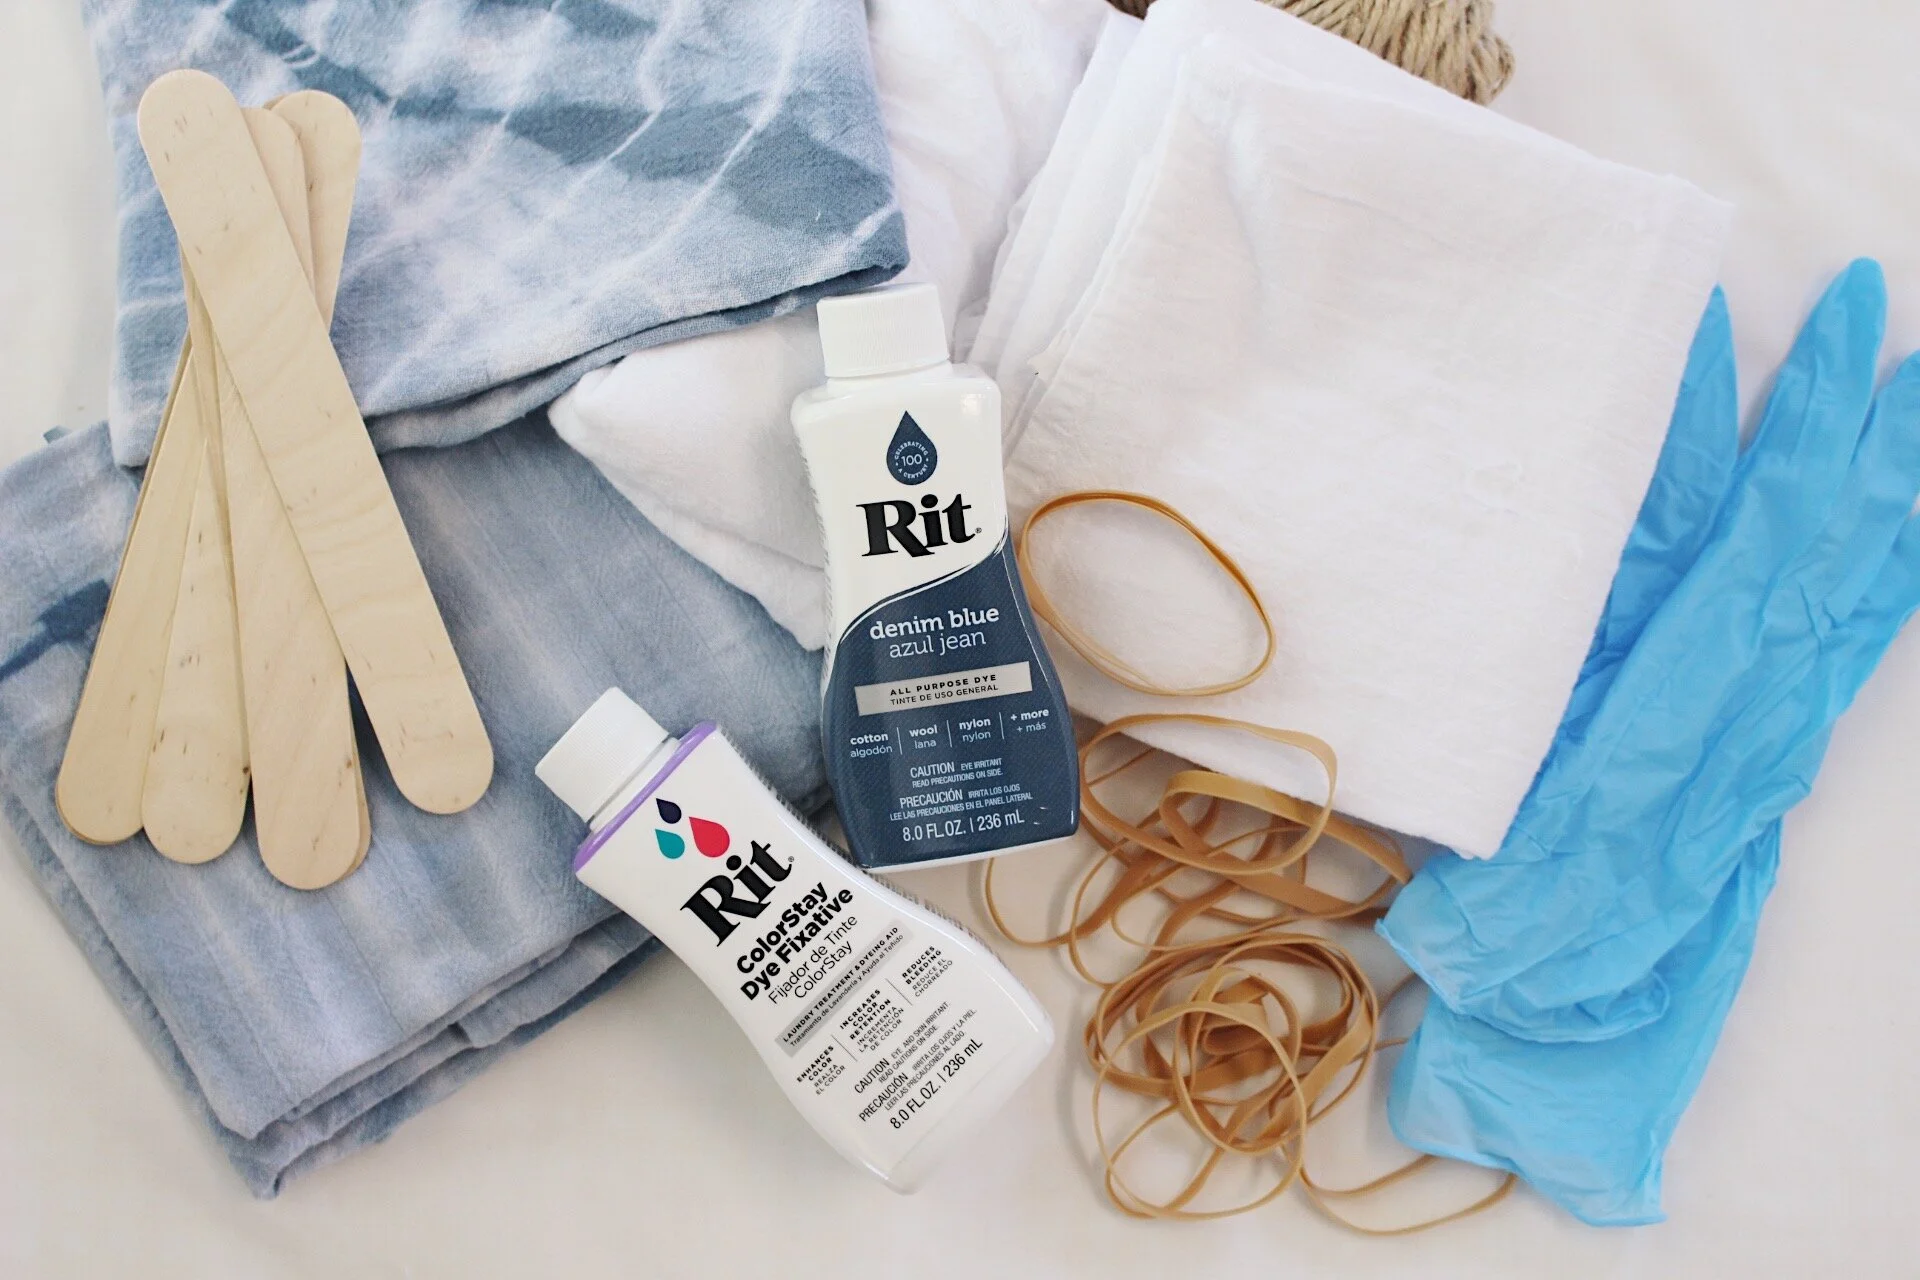
Supplies:
Tea Towels: You can get a pack of 4 from Target for about $4 or if you are planning on making a lot at once it is cheaper to buy them in bulk. You can purchase them here from Amazon.
Rubber Bands, Popsicle Sticks, and Twine for binding fabric
Latex Gloves
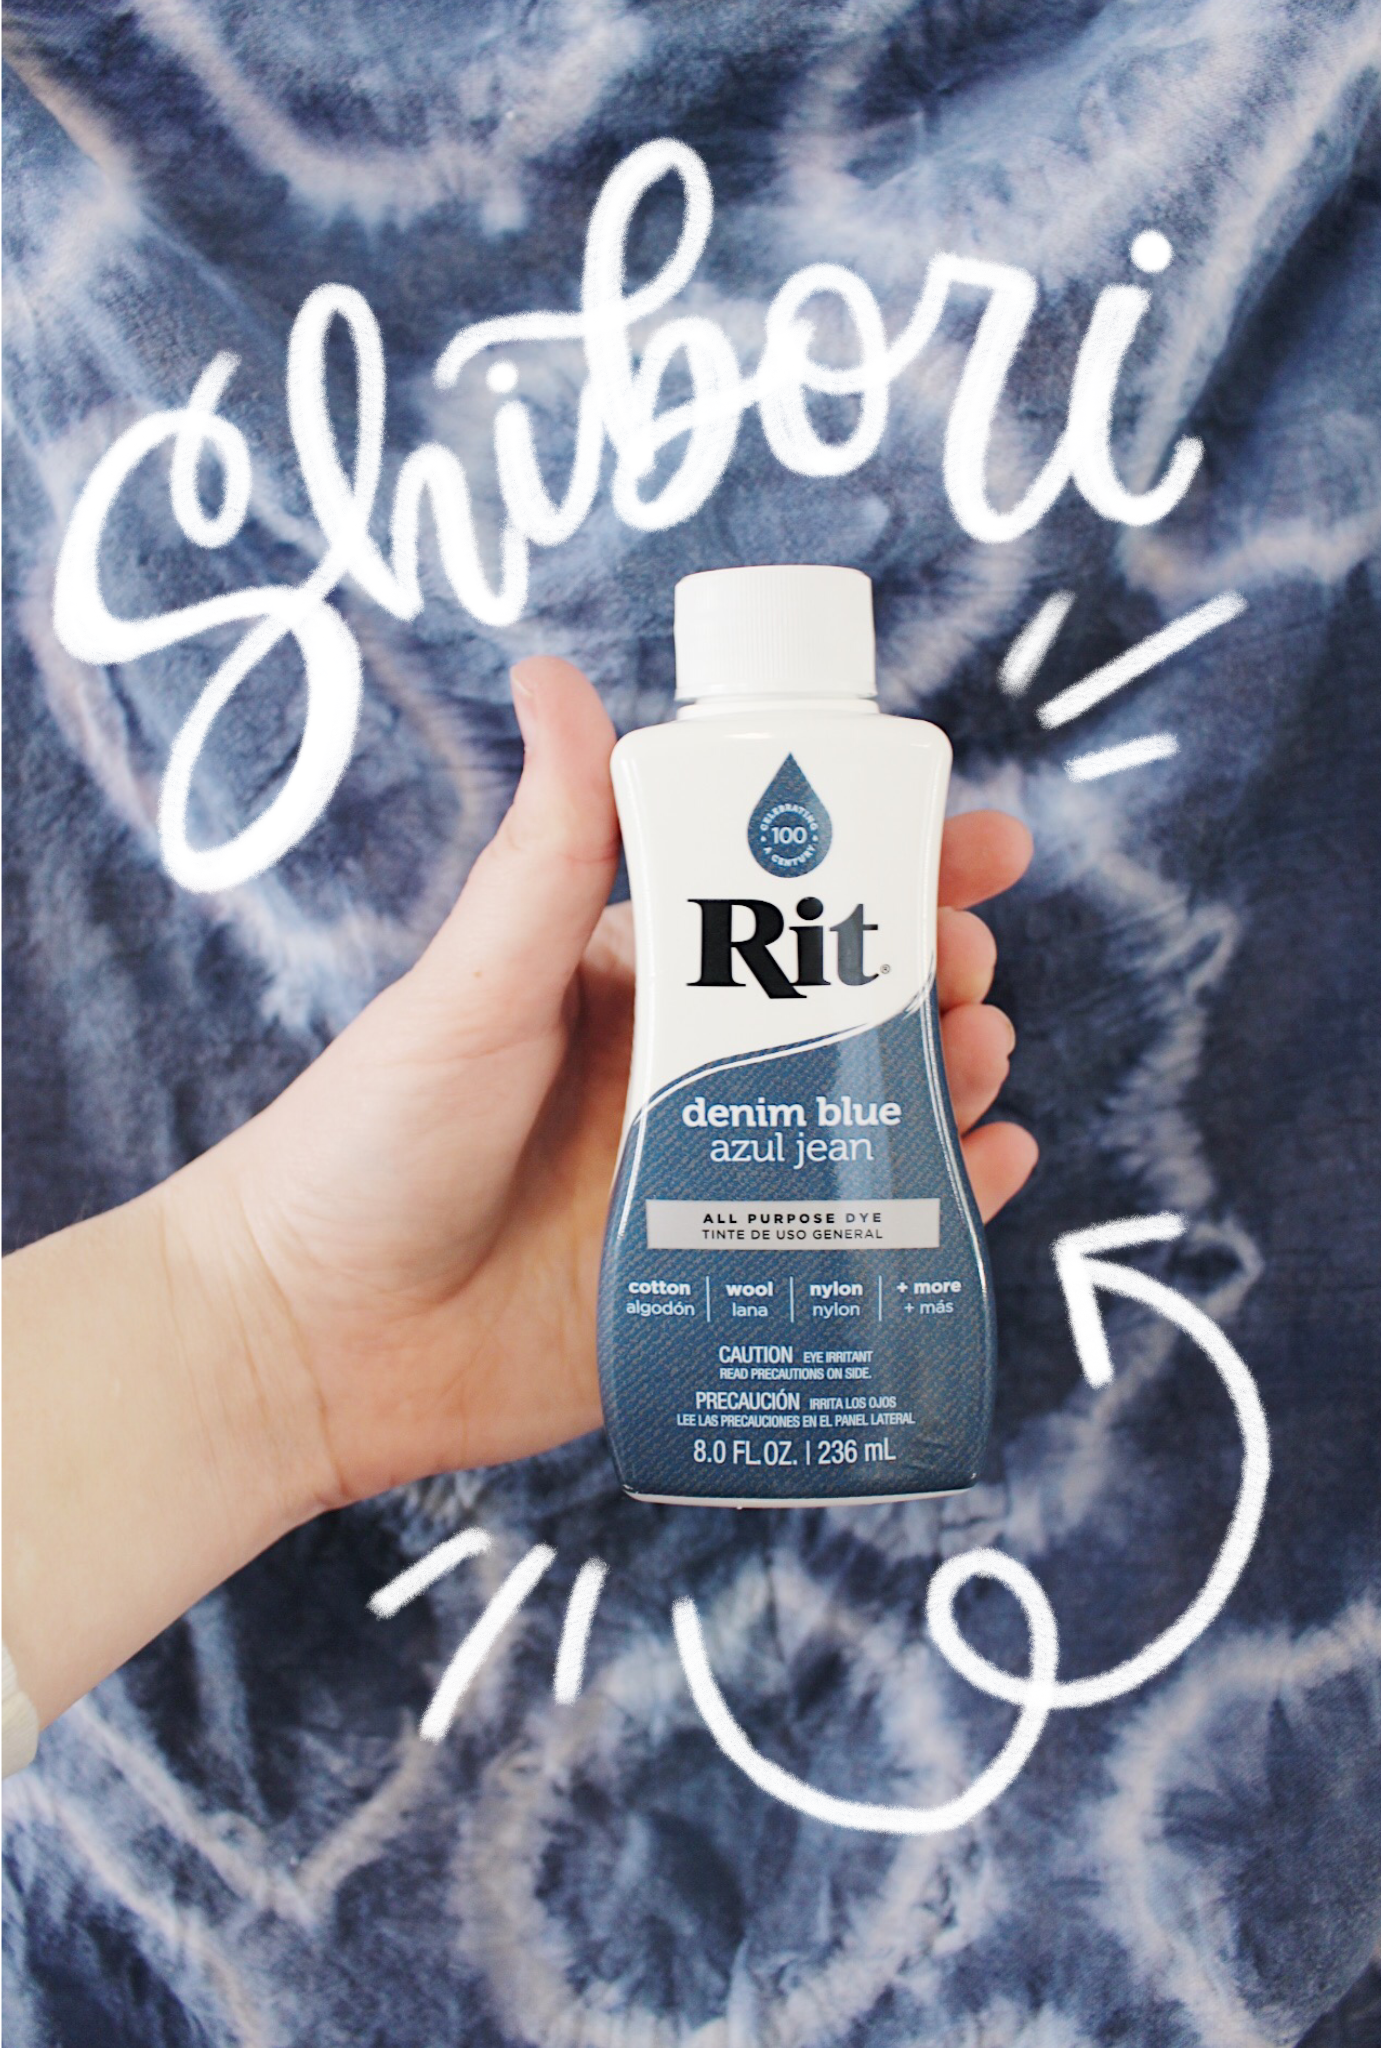
RIT Dye Denim Blue and ColorStay Fixative: You can usually find these at any craft store, but sometimes Hobby Lobby doesn’t have it so I usually find it at Michael’s. You can also find it here on Amazon.
A large bucket: I use a 5-gallon painters bucket from Home Depot and it holds a lot. I would definitely suggest this if you are dying larger items or a lot at once.
Small pieces of plastic/wood : I cut mine out of a yard sign. This worked really well because it kept its shape and I’ve been able to reuse them for multiple projects. You could also probably find small pieces of wooden squares at any craft store.
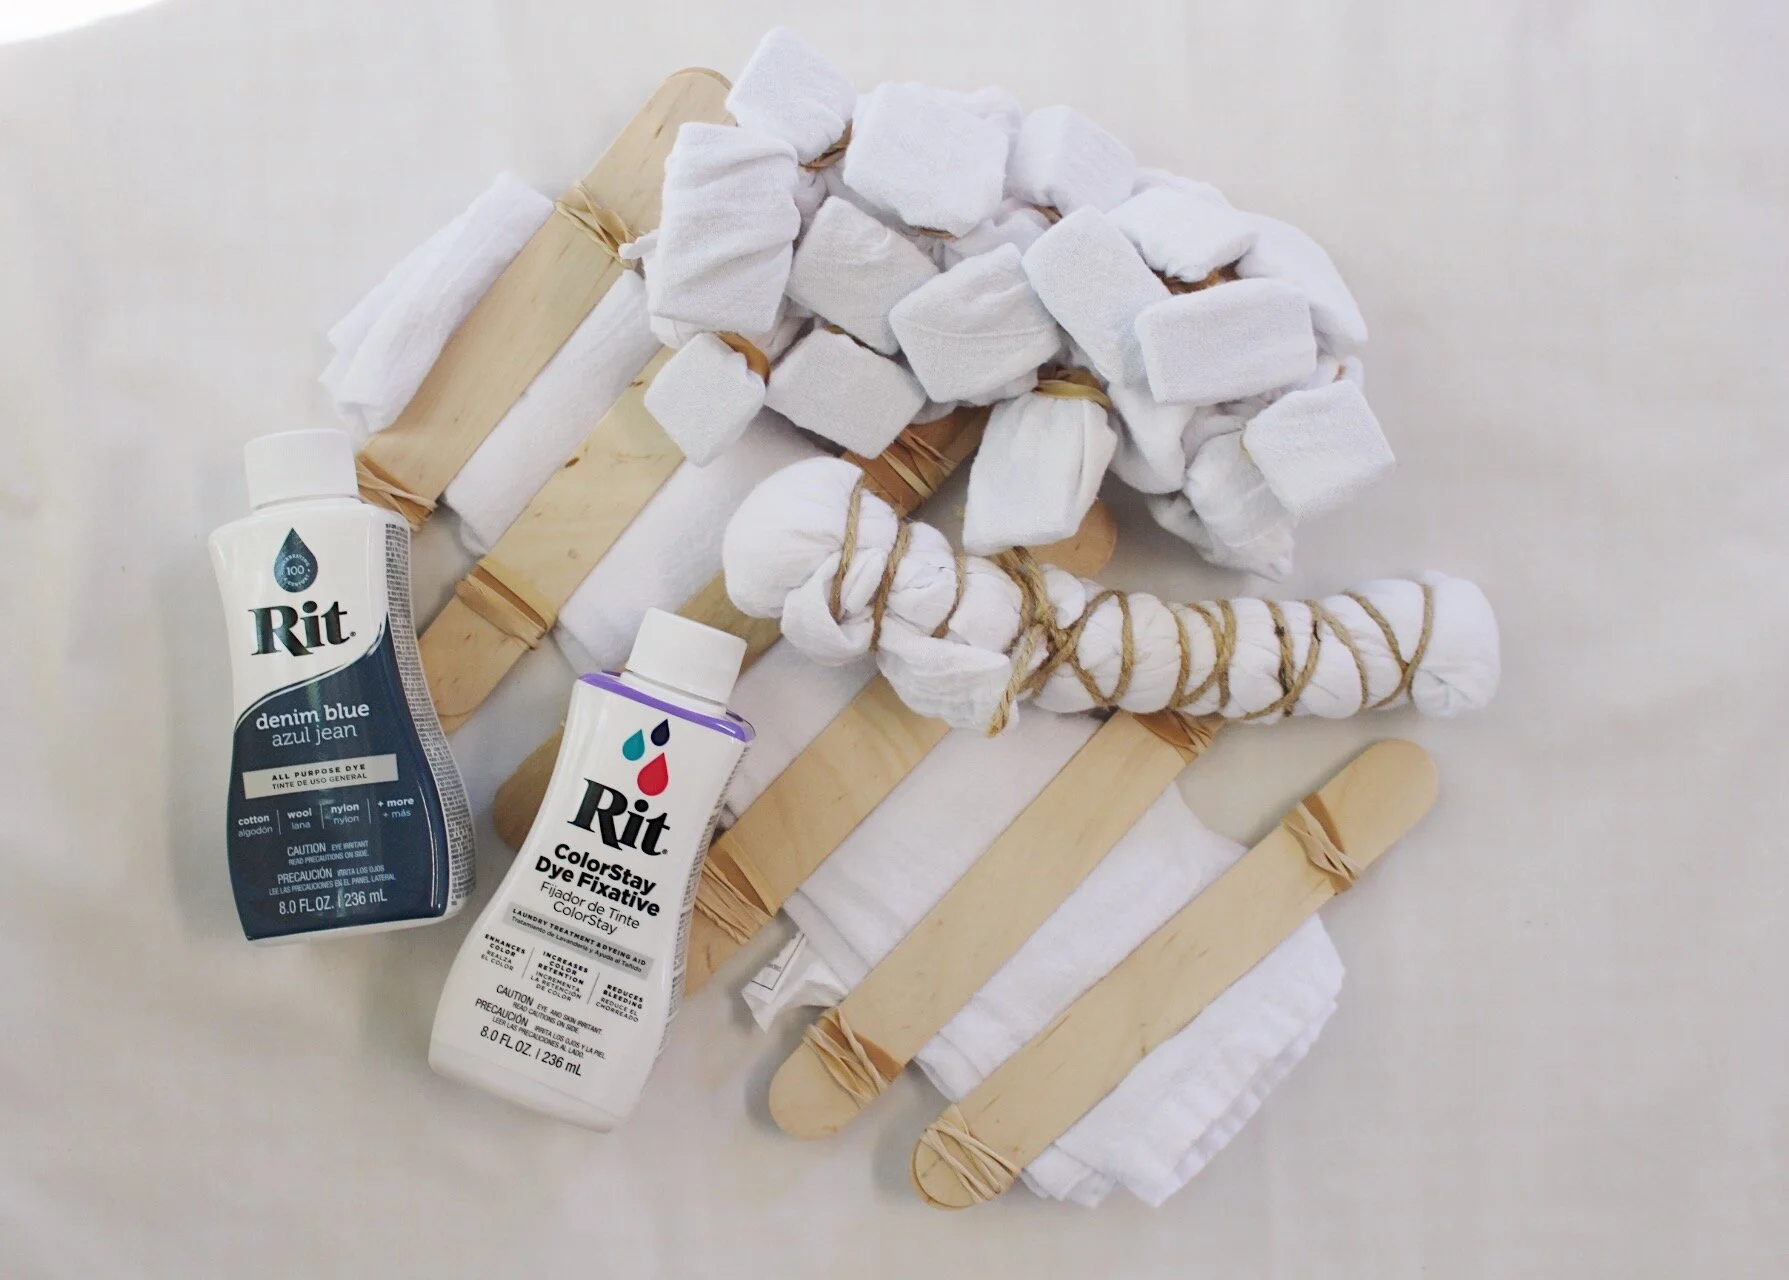
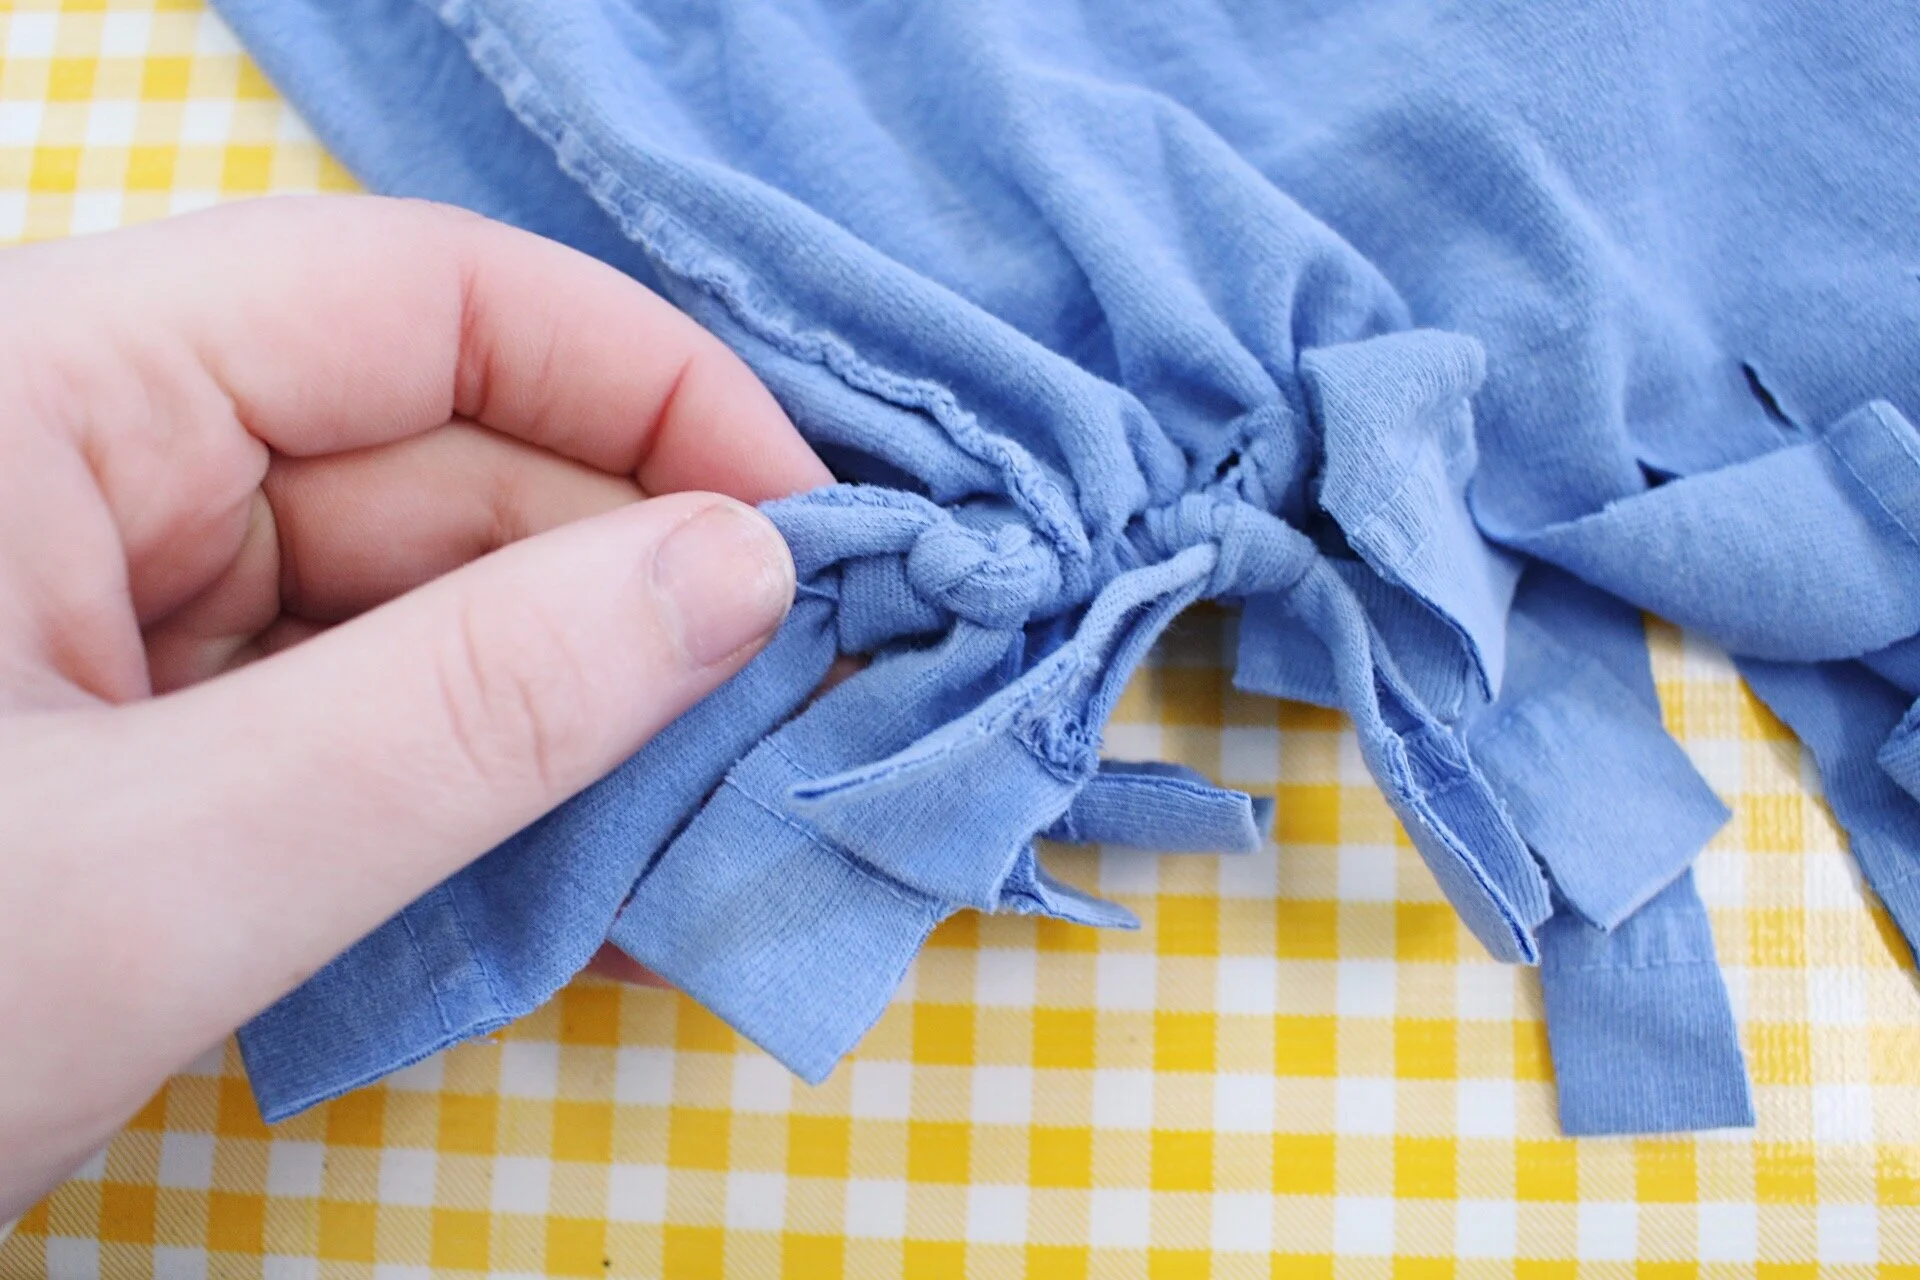
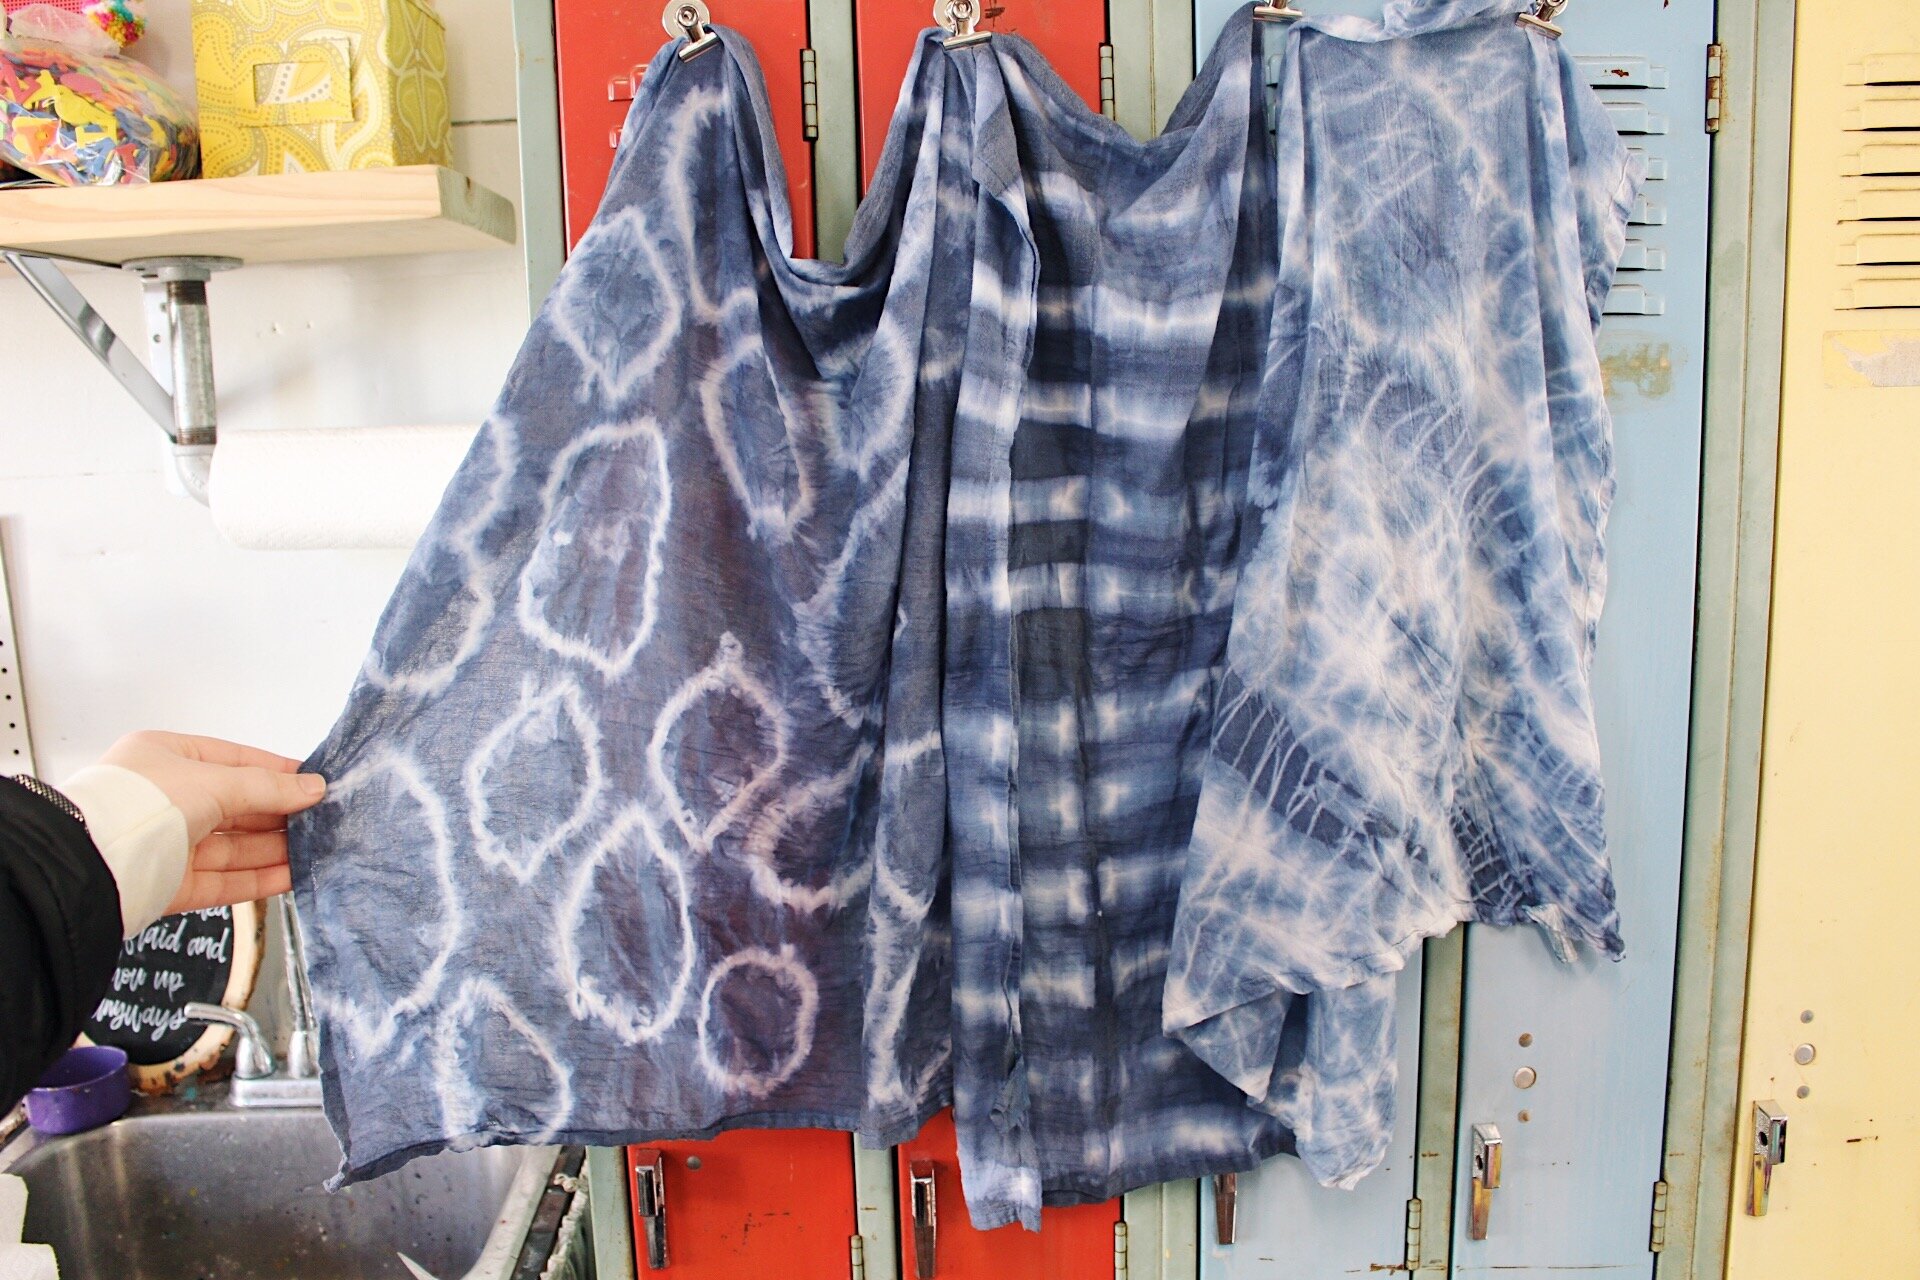
Pattern No. 1: We will start with the Popsicle Stick towel. So I began by folding the tea towel in half twice and then folding it in half once the other way (really it doesn’t matter how you get that fold- as long as its folded long ways like a hotdog). I then took my popsicle sticks and rubber bands and began creating those patterns of resistance. I placed a popsicle stick on both sides of the towel, lined them up, and bound them together with a rubber band. Make sure you tighten those rubber bands as much as possible. Repeat on both sides and all the way down the towel. Leave about an inch between each set of sticks. It’s pretty simple, huh?!
Pattern No. 2: Up next is the towel with the twine. For this tea towel I started by laying it out completely flat. I took 2 opposite corners and pulled it tight. I began twisting the corners so that the towel becomes a strand of twisted fabric. I folded that over twice long ways. (Again, the twisting and folding doesn’t have to be perfect- it just creates different areas of resistance to the dye). I then took the twine and started wrapping it tightly around the fabric. Make sure you are pulling it tight. You can create any pattern you want here. When you are done, tie off the end.
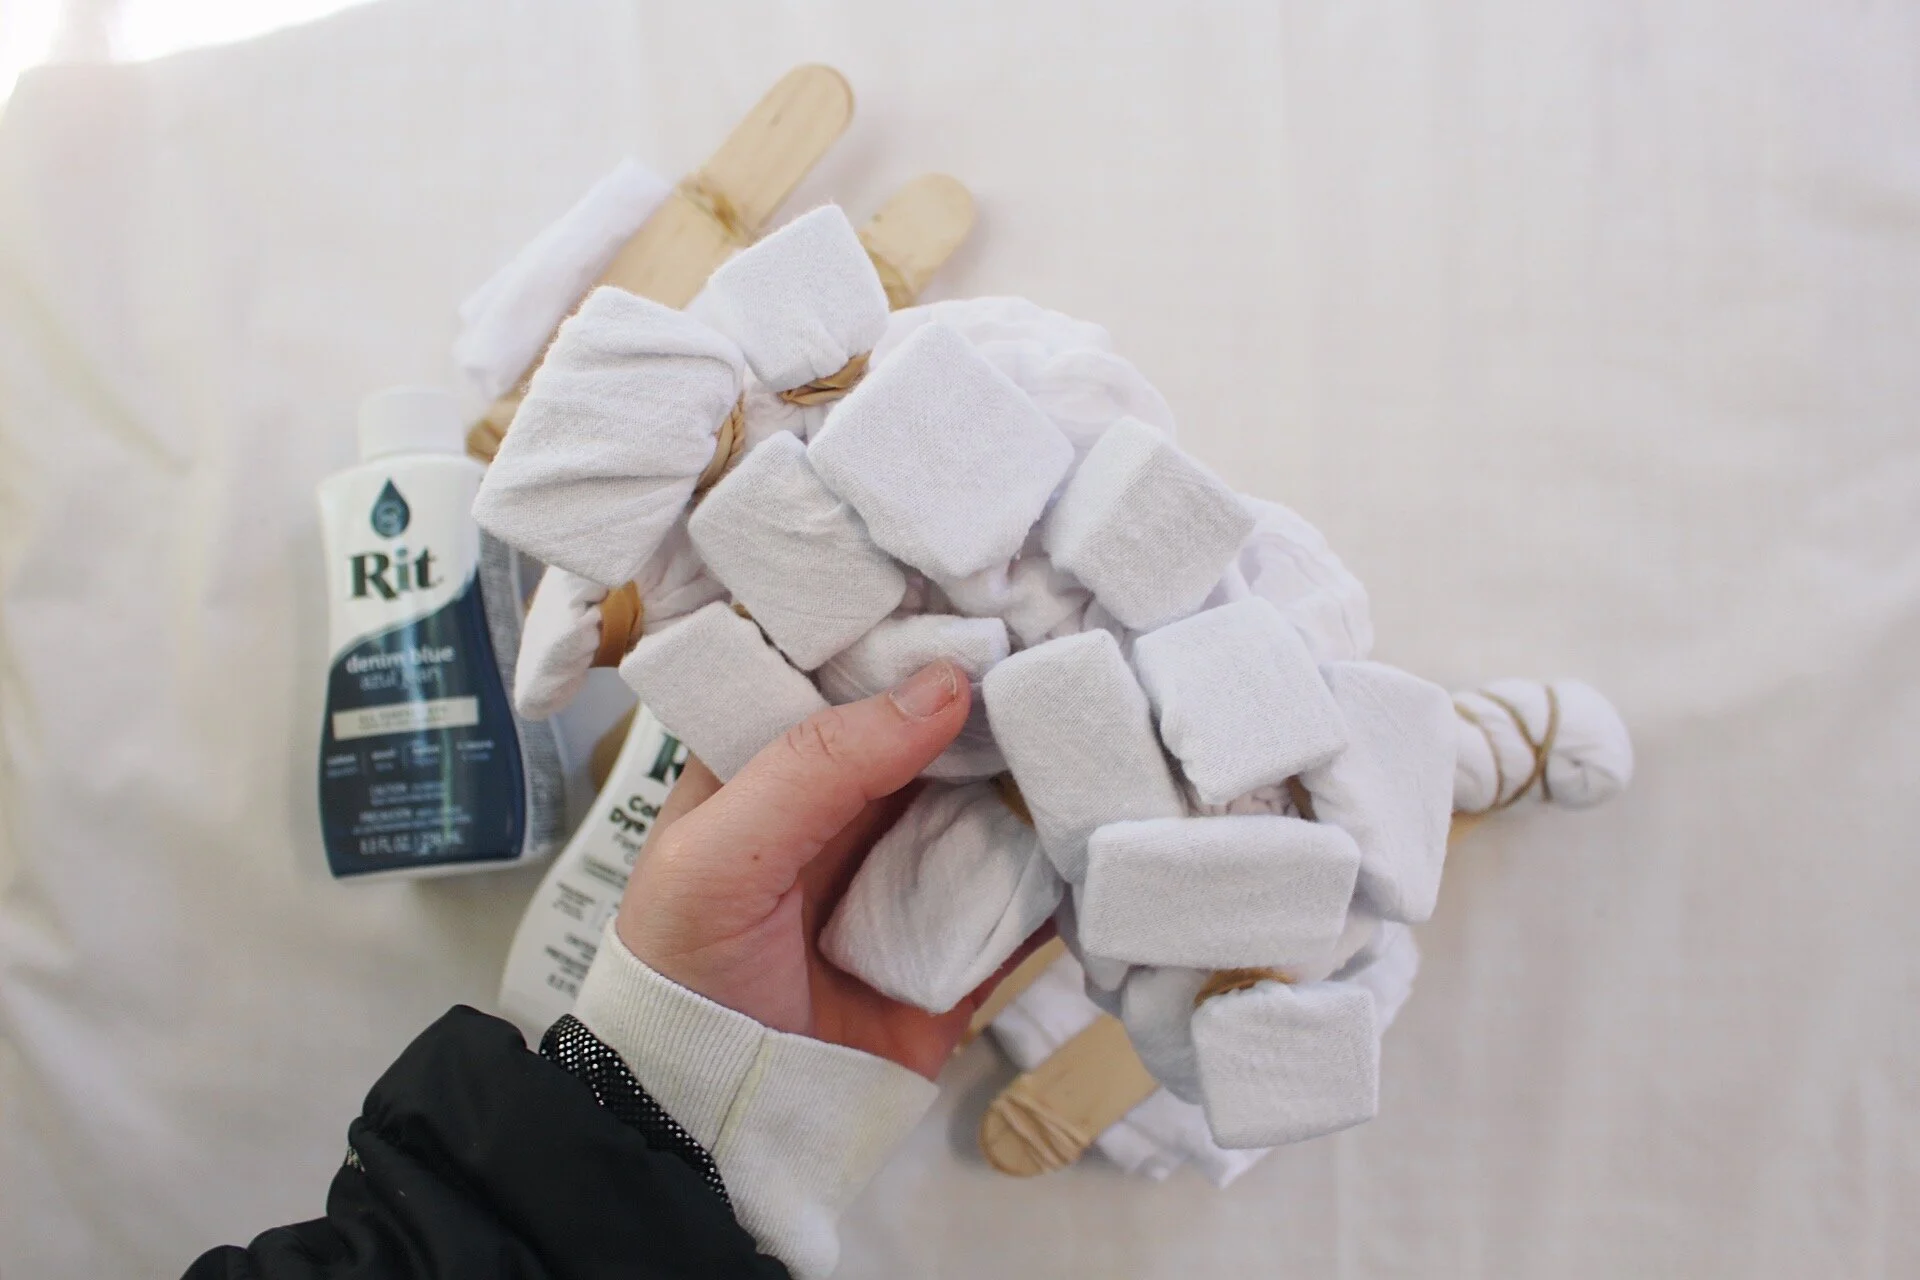
Pattern No. 3: The last pattern we will do today is the square bubble pattern. This is one of my favorite patterns for shibori!! So for this one I fold the tea towel down the middle once. I take my small square pieces and set it under the fabic (both layers together) I pick it up with the fabric and wrap a rubber band around the square. It creates this little square bubble. I repeat this until all the fabric is wrapped around the square pieces. (see photo above for example!)
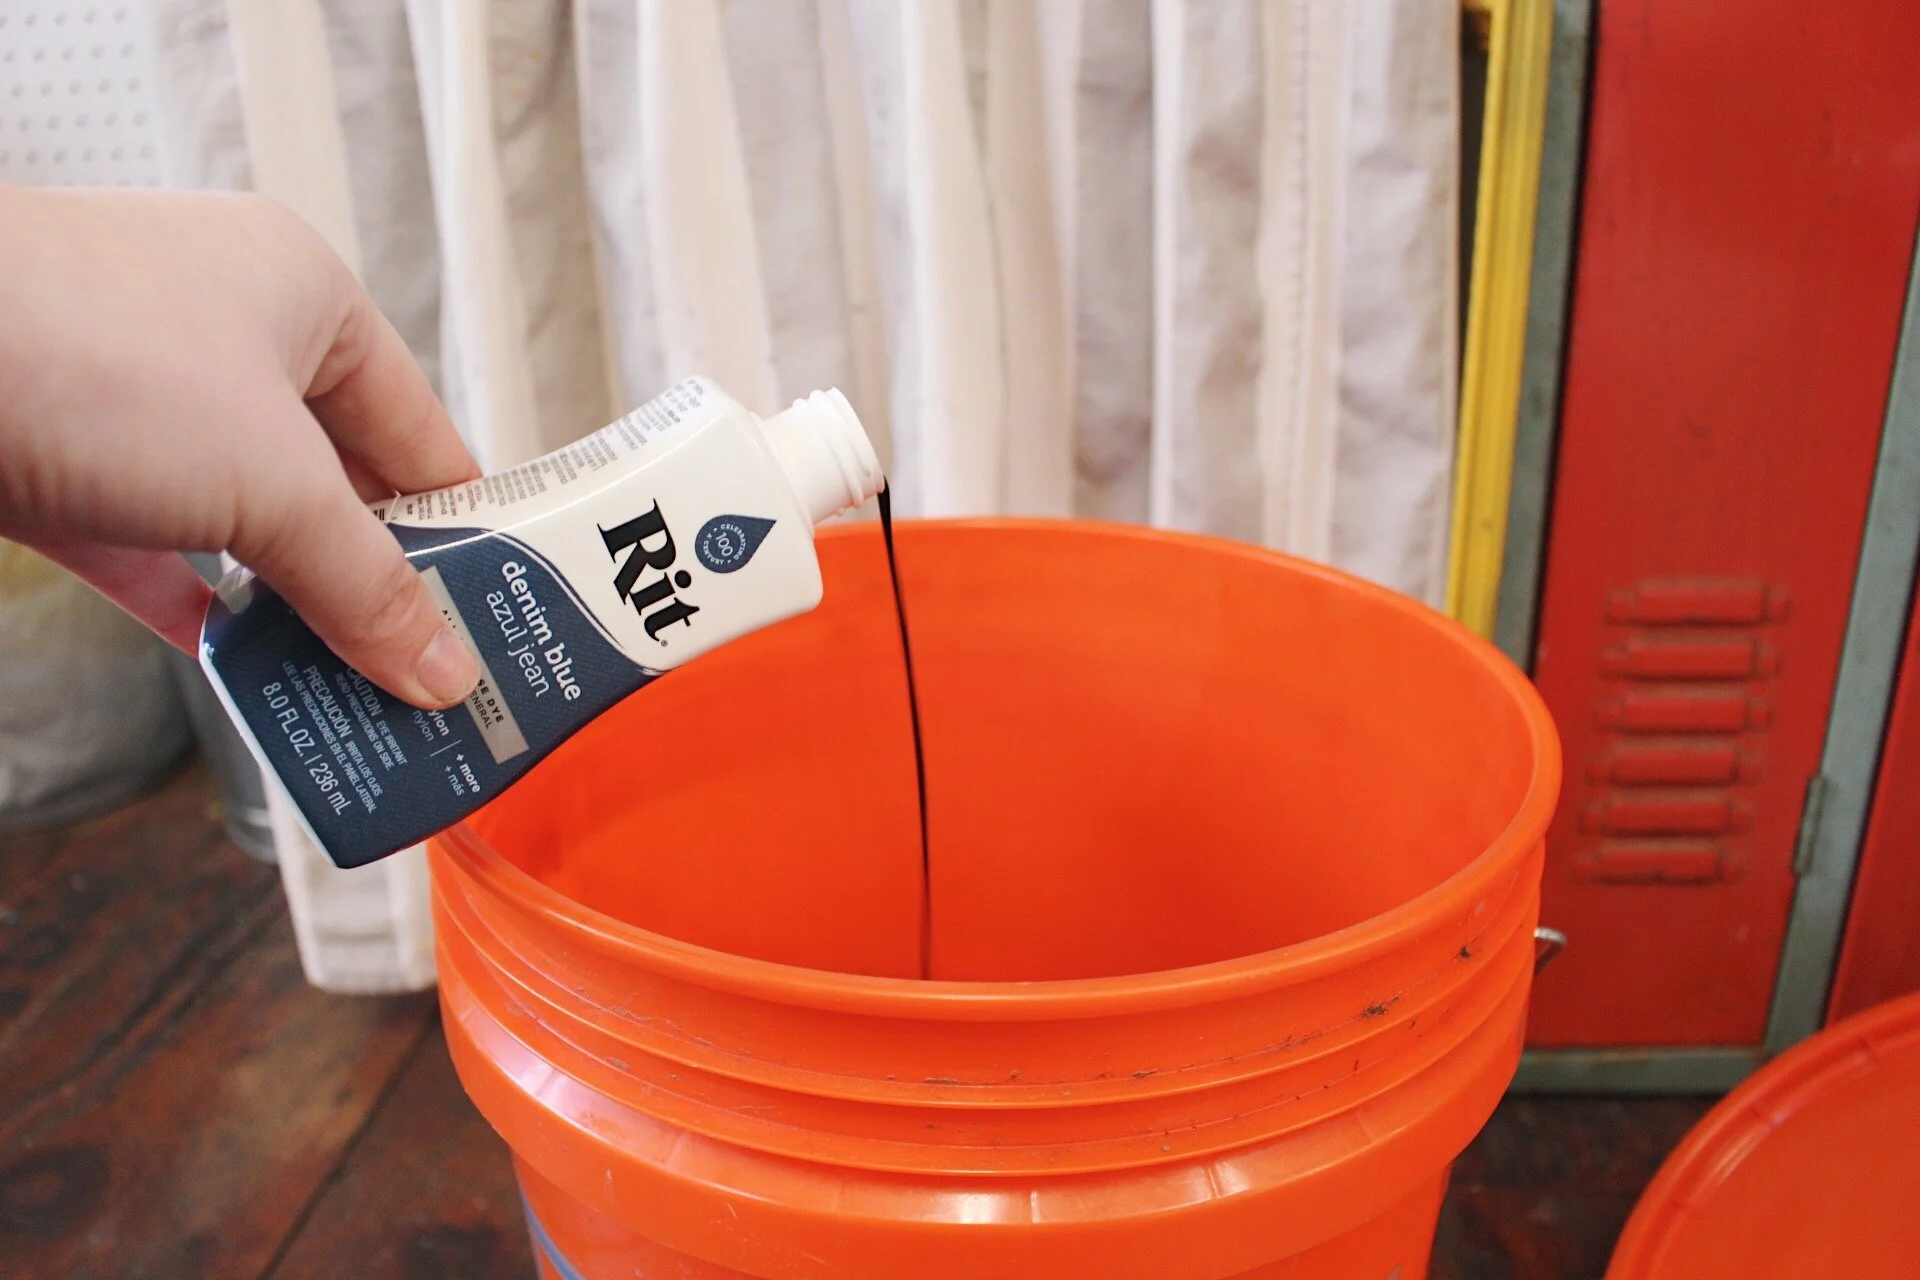
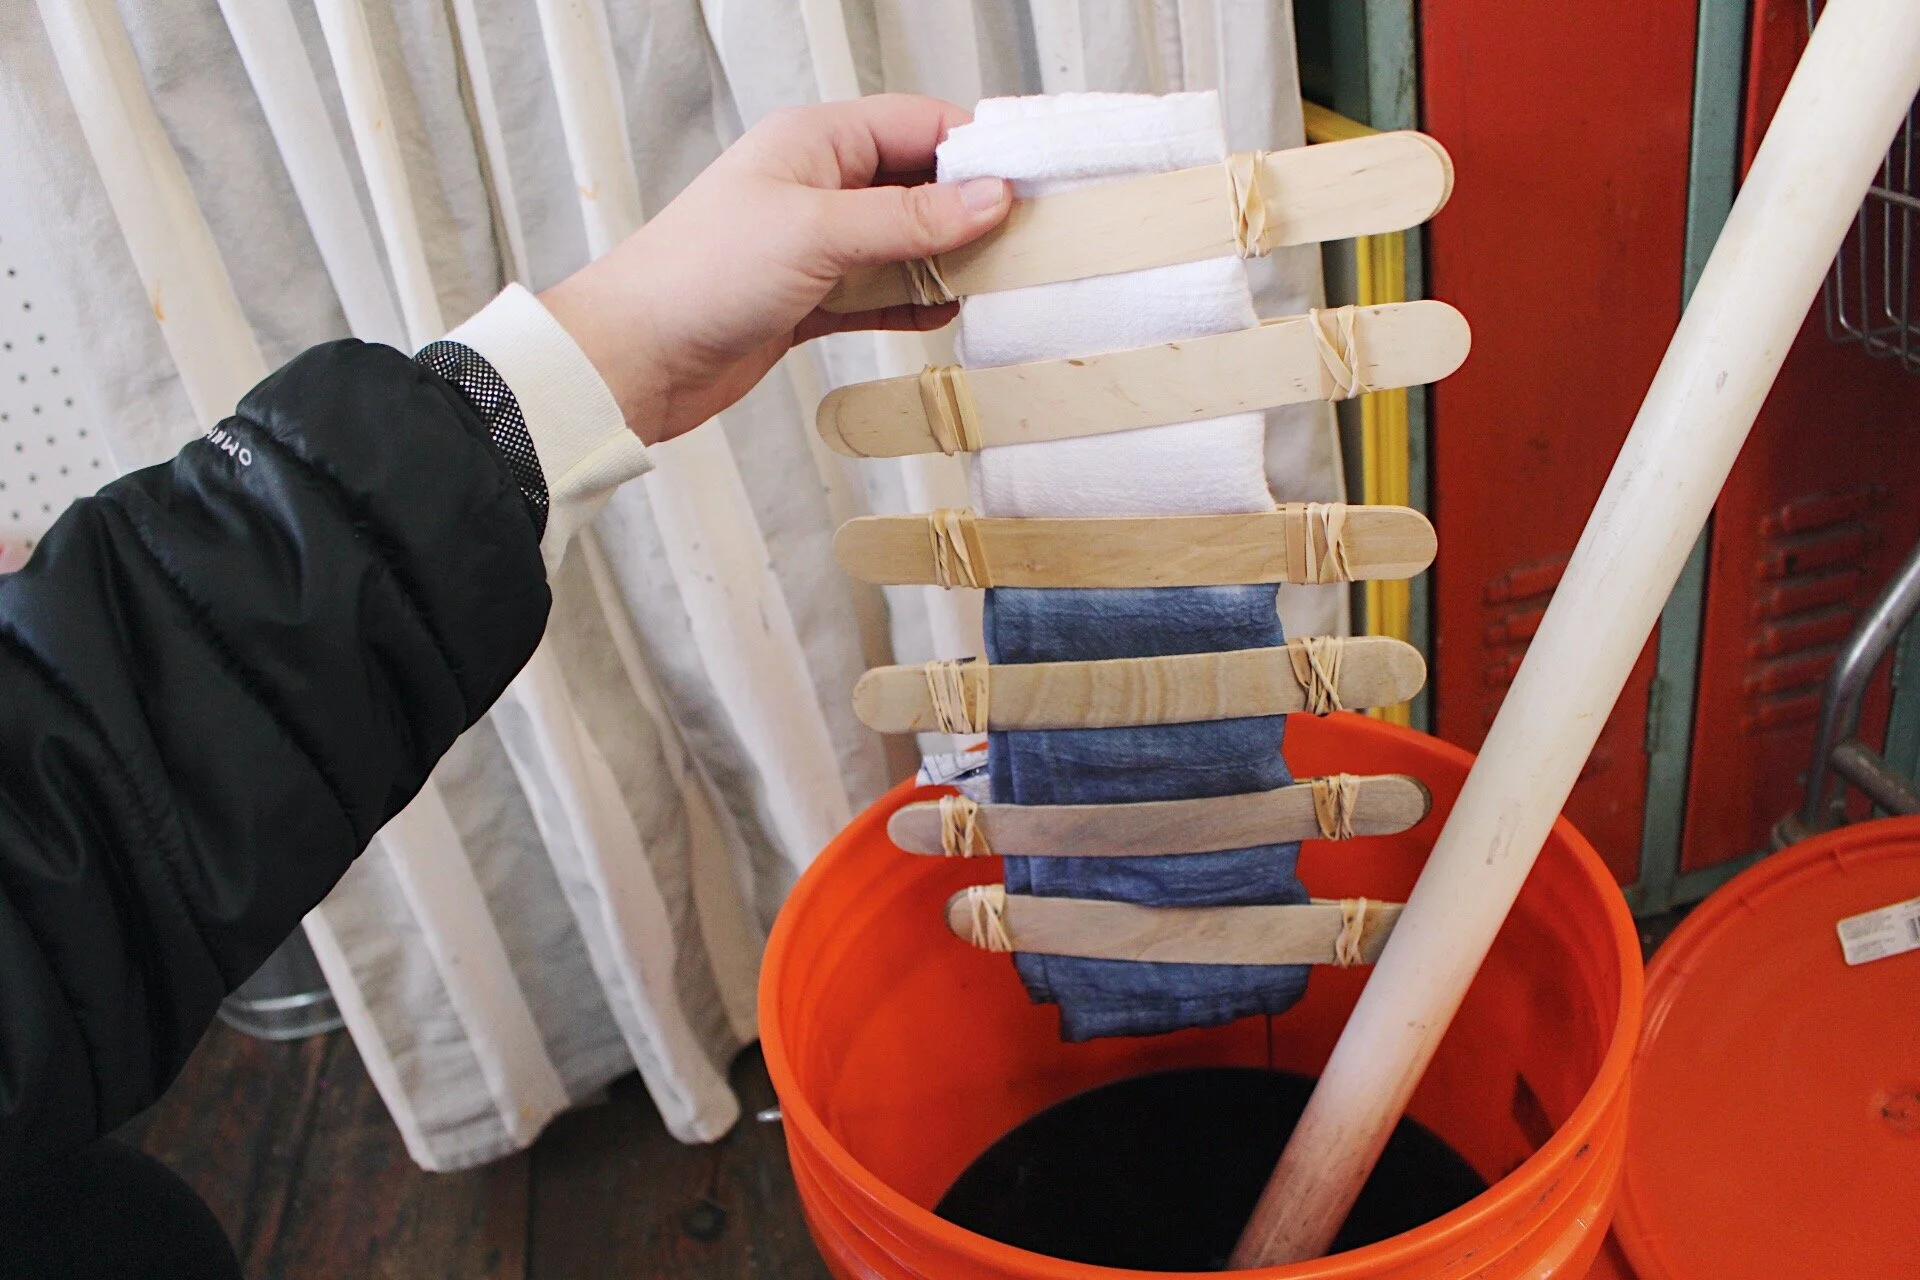
So once you have you pattern on your tea towels, you are ready to put them in the dye bath. Grab your Rit Dye bottle of Denim Blue and follow the directions on the bottle. These will differ, depending on how much fabric you are dying and the size of your bucket. Once you have read and followed the directions of prepping your dye bath- you are ready to go! Place your tea towels into the bucket and start your timers. I usually leave my items in for about 30 min. Make sure that you stir the contents 3-4 times during the 30 minutes.
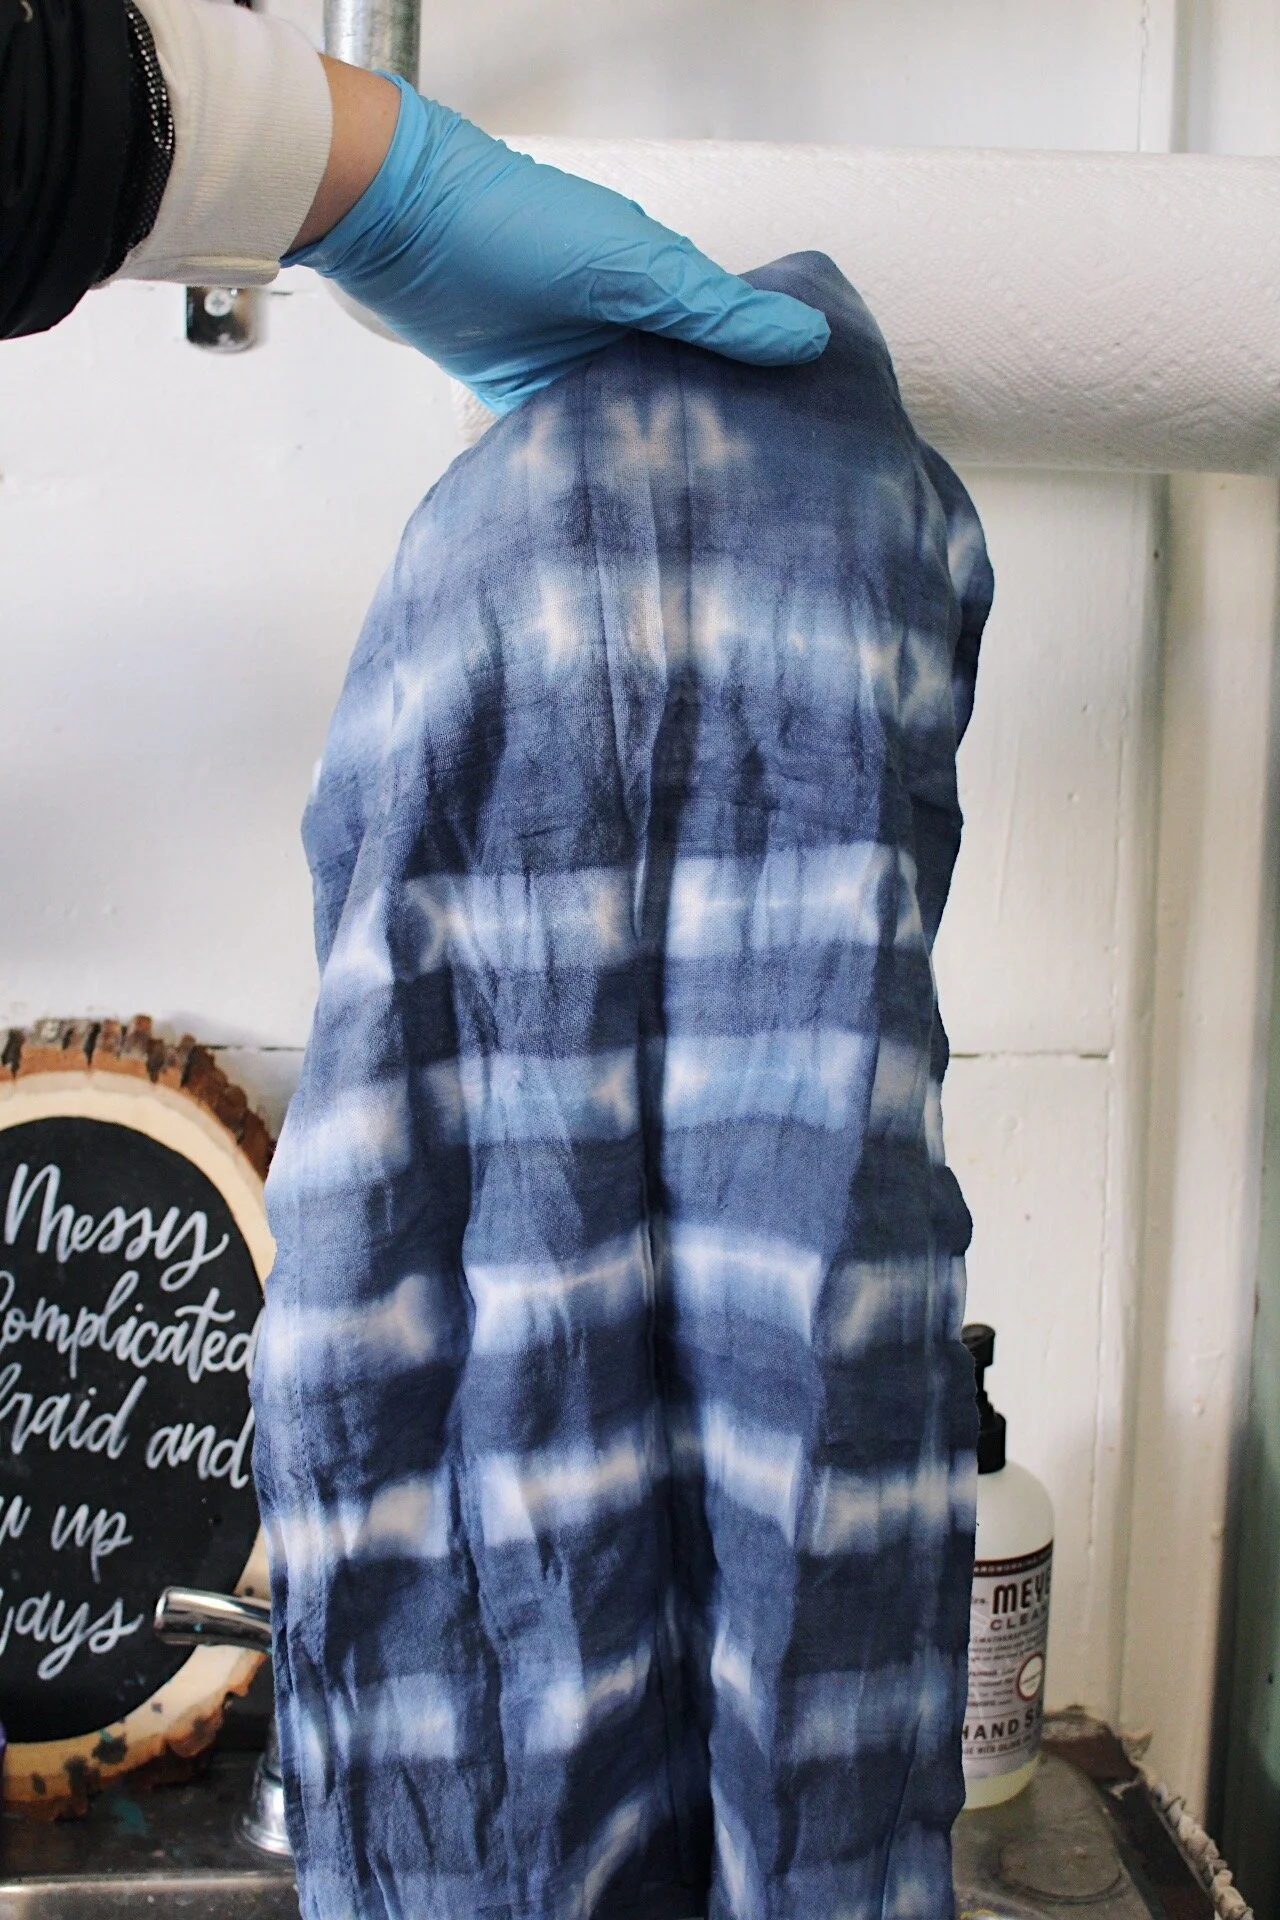
Once your 30 min is up, pour out the dye bath and rinse the towels in hot water. I would suggest wearing your gloves during this step, because the dye is pretty strong! You don’t want to have frostbite hands for the next few days!! Don’t remove any of the sticks, twine, or rubber bands yet! We still need to let them soak in the color fixative for 30 min so they keep their color longer! Wash out the bucket and grab your Rit ColorStay Fixative. Follow directions on bottle to prepare the next bath. Once you have prepared it, put the towels in the bucket and set your timer for another 30 min.
Once the 30 min is up, you can go ahead and pour out the water and rinse the towels once more in hot water. You can remove all the sticks, rubber bands, and twine. and THERE YA GO!!! Check out all your hard work and patience.
Popsicle Sticks
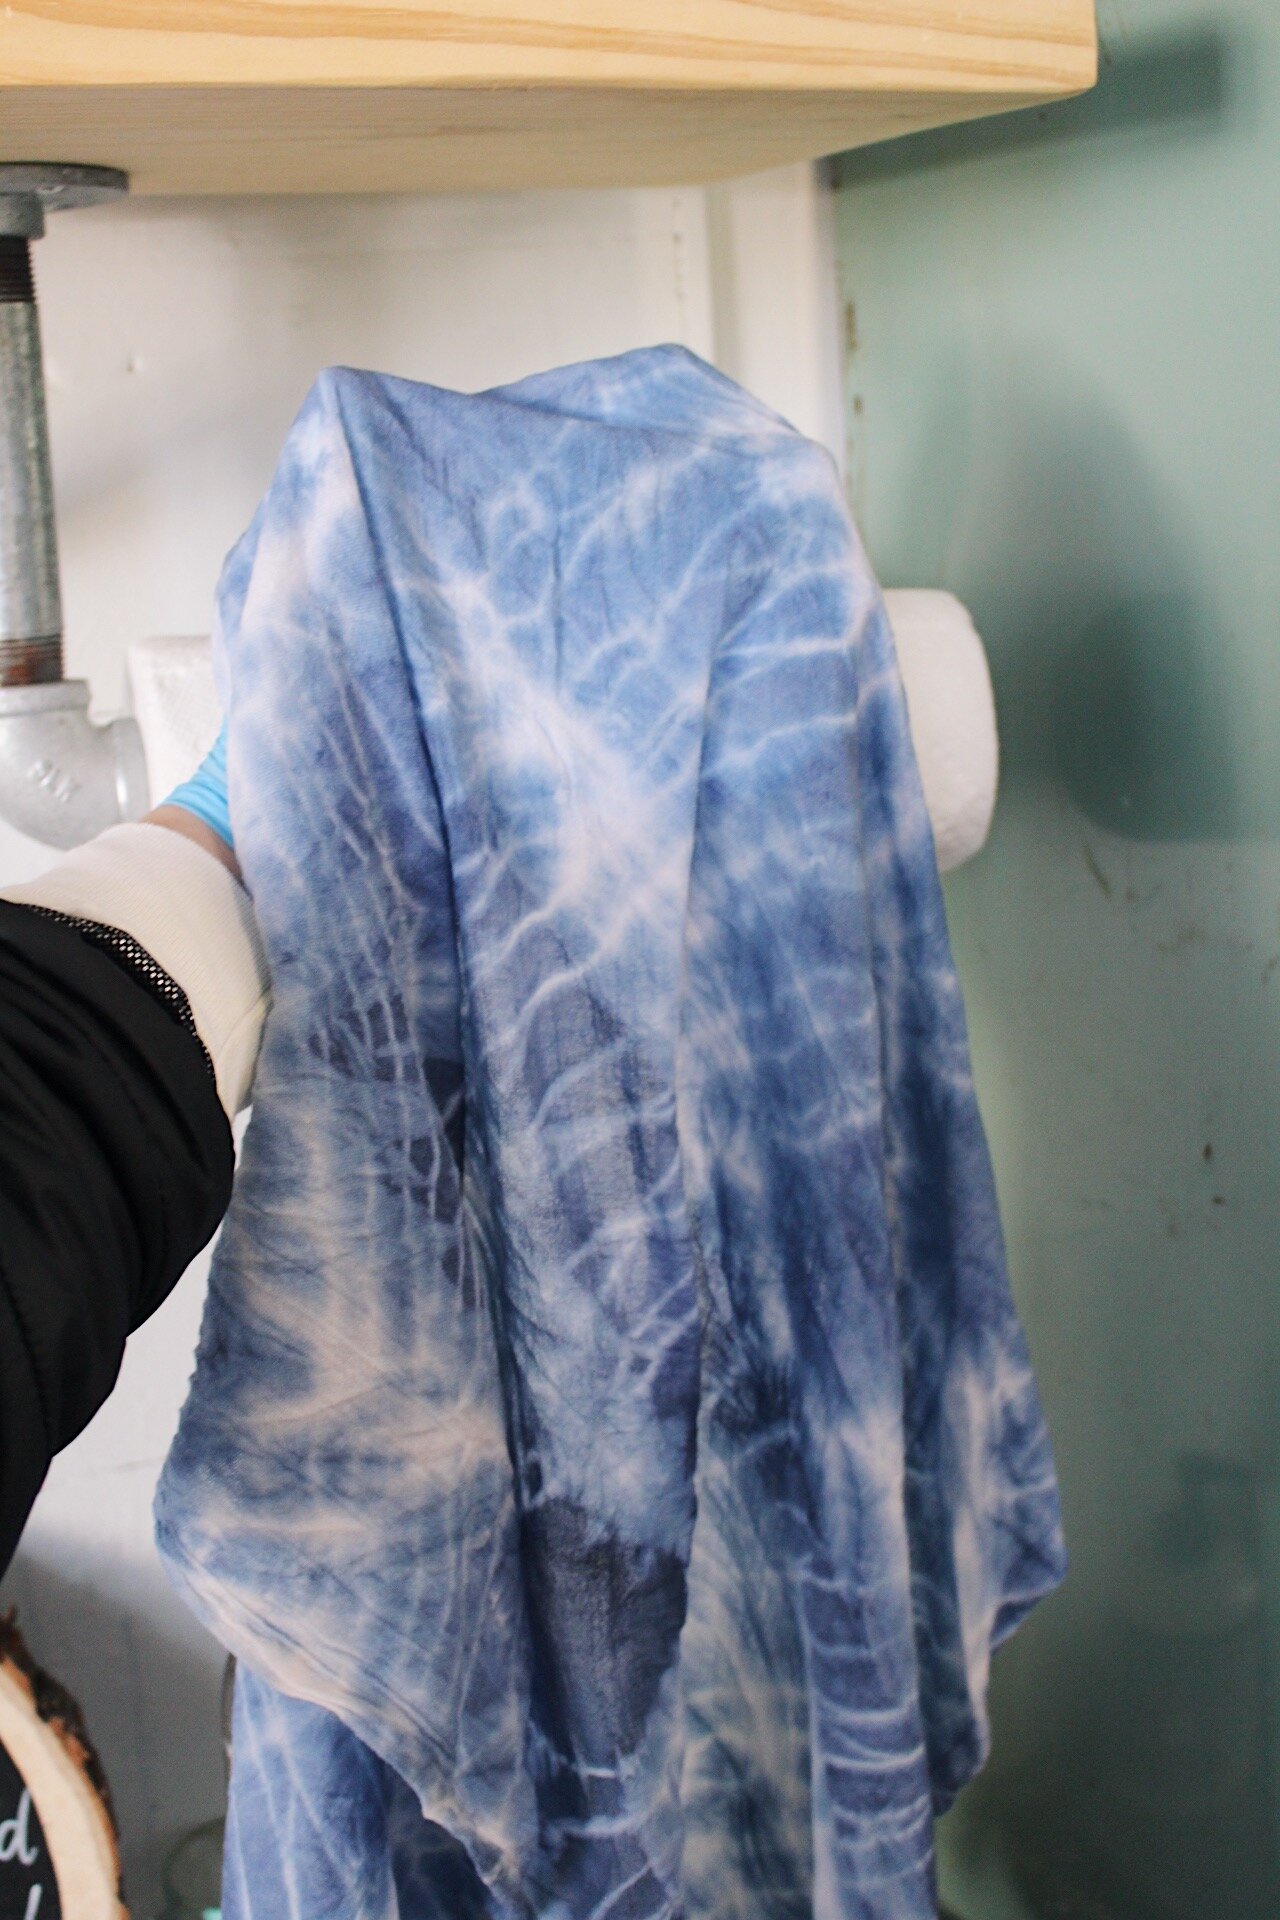
Twine
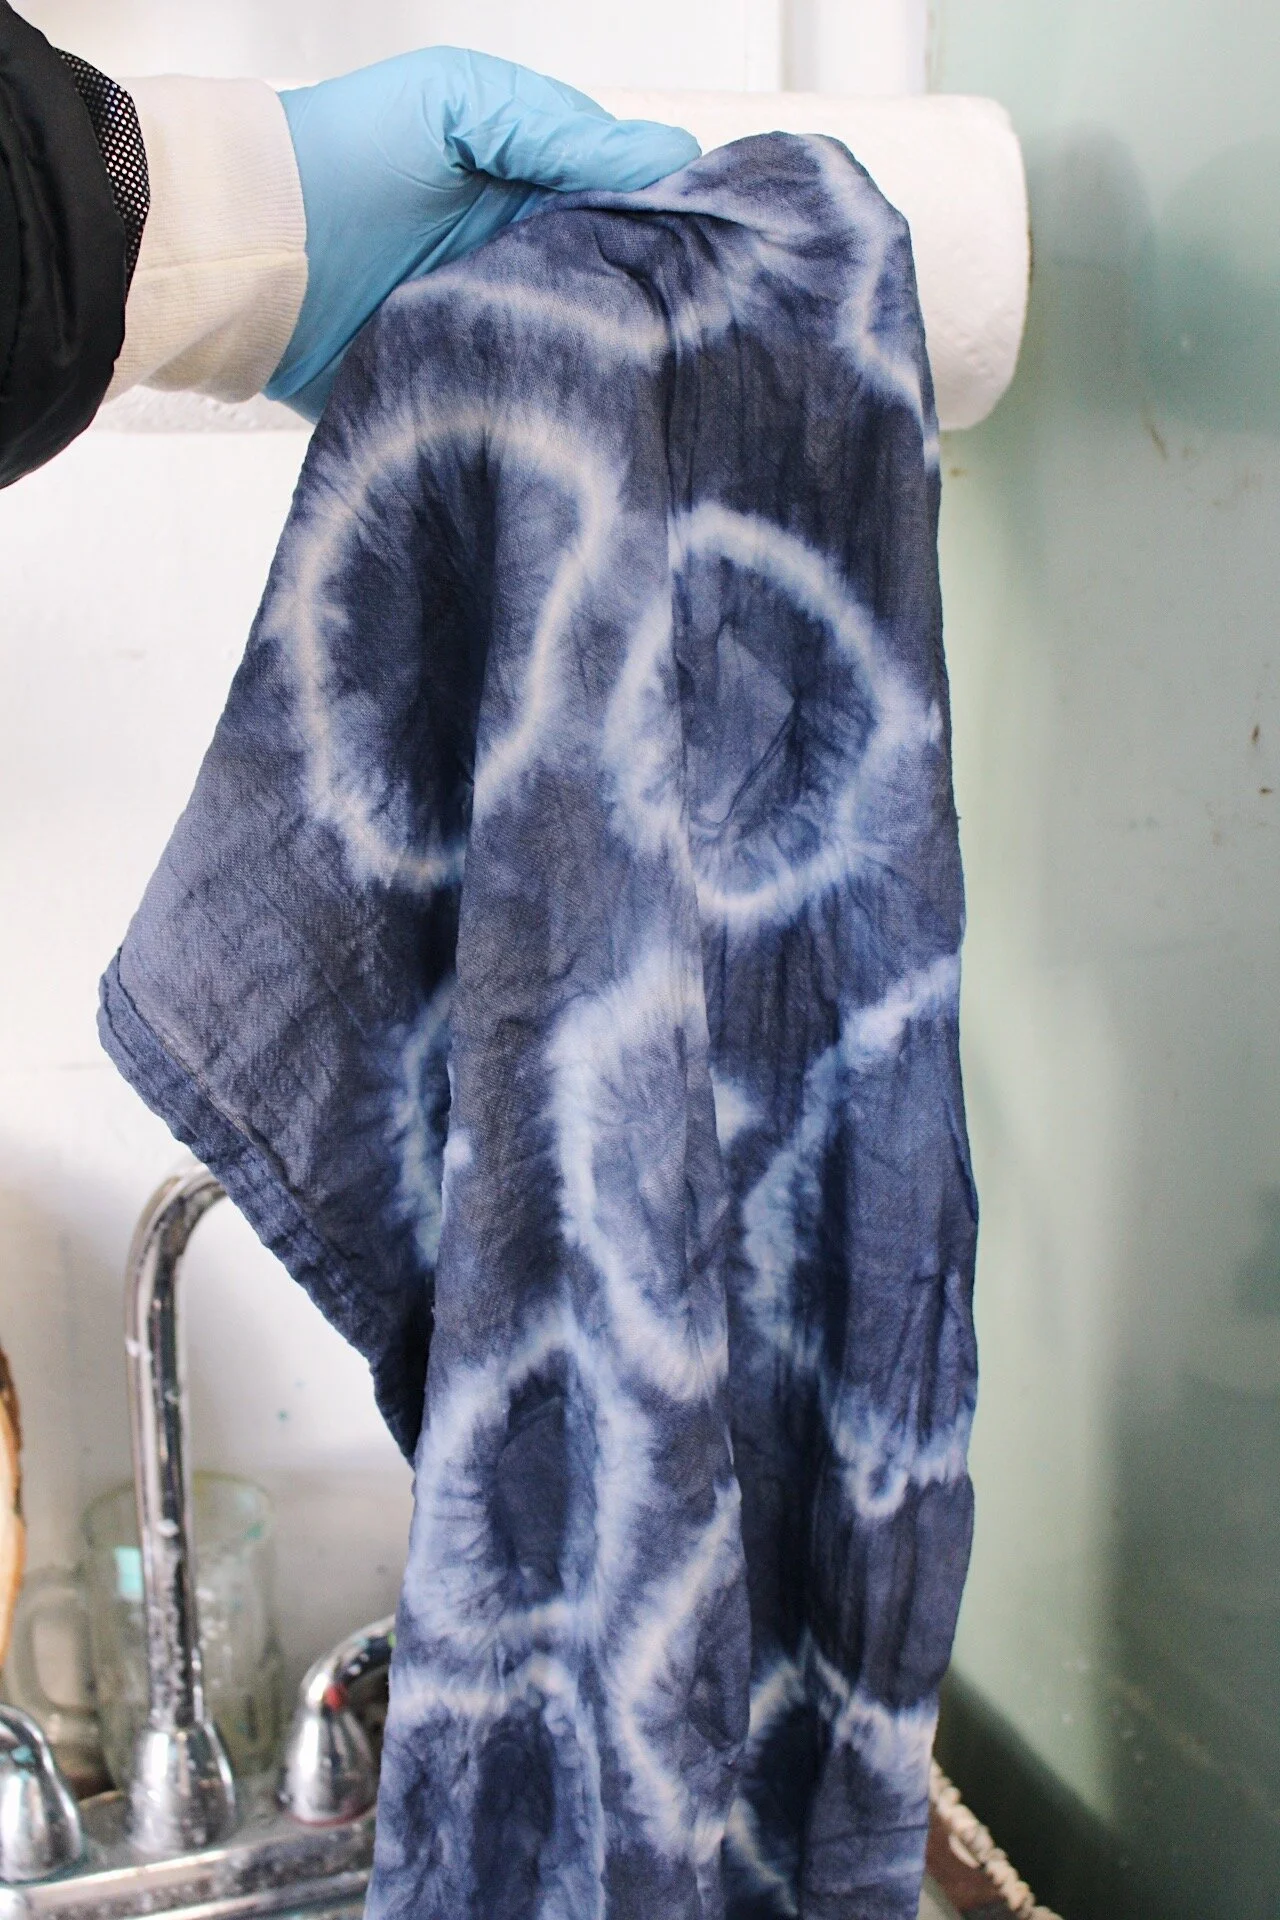
Square pieces
I hope you all enjoyed this super fun Shibori project. Let me know if you have any questions or if you try the project out!! I’d love to see process pics and your end product!!
If you want to try this project out, but don’t want to go through all the work by yourself, check out our workshops page. We have local classes every month and there might be a Shibori one coming up soon!! Come and hangout with us at Yellow Room and let your creative juices flow!! See y’all soon!